


In a world where privacy feels like a rare gem, private browsing on an iPhone can seem like the ultimate cloak of invisibility. But what happens when that cloak gets a little too cozy? Maybe it’s time to shed those incognito vibes and let the sunshine in. Whether you’re trying to access your favorite websites or just want to keep track of your online adventures, turning off private browsing is a breeze.
Don’t worry—getting back to regular browsing doesn’t require a PhD in tech wizardry. With just a few taps, you’ll be back to surfacing the web like a pro. So grab your iPhone and let’s dive into the simple steps that’ll have you browsing freely in no time. After all, who needs secrets when you can have seamless scrolling?
Understanding Private Browsing on iPhone
Private browsing offers a way to surf the web without leaving a trace on an iPhone. Users seeking anonymity appreciate this feature, as it limits the storage of browsing history and cookies.
What Is Private Browsing?
Private browsing, often called private or incognito mode, prevents the browser from storing user data during a session. This feature helps keep web surfing activities confidential. When enabled, it stops websites from tracking users and eliminates local storage concerns. Users experiencing shared devices or sensitive inquiries benefit most. Browsers automatically discard browsing details after closing the session, ensuring privacy remains intact.
Benefits of Using Private Browsing
Utilizing private browsing has several advantages. First, it prevents the accumulation of cookies, which can enhance user privacy. Second, users can confidently access sensitive sites like online banking or shopping, without leaving behind traces. Third, those experimenting with different search queries find that private mode reveals unbiased results, free from previous search influences. Fourth, users can effectively avoid targeted ads, as user data remains untracked. Lastly, it enables access to regional content by masking location-specific browsing history.
Steps to Take Off Private Browsing on iPhone
Disabling private browsing on an iPhone is quick and straightforward. Users can regain standard browsing functionality with a few taps.
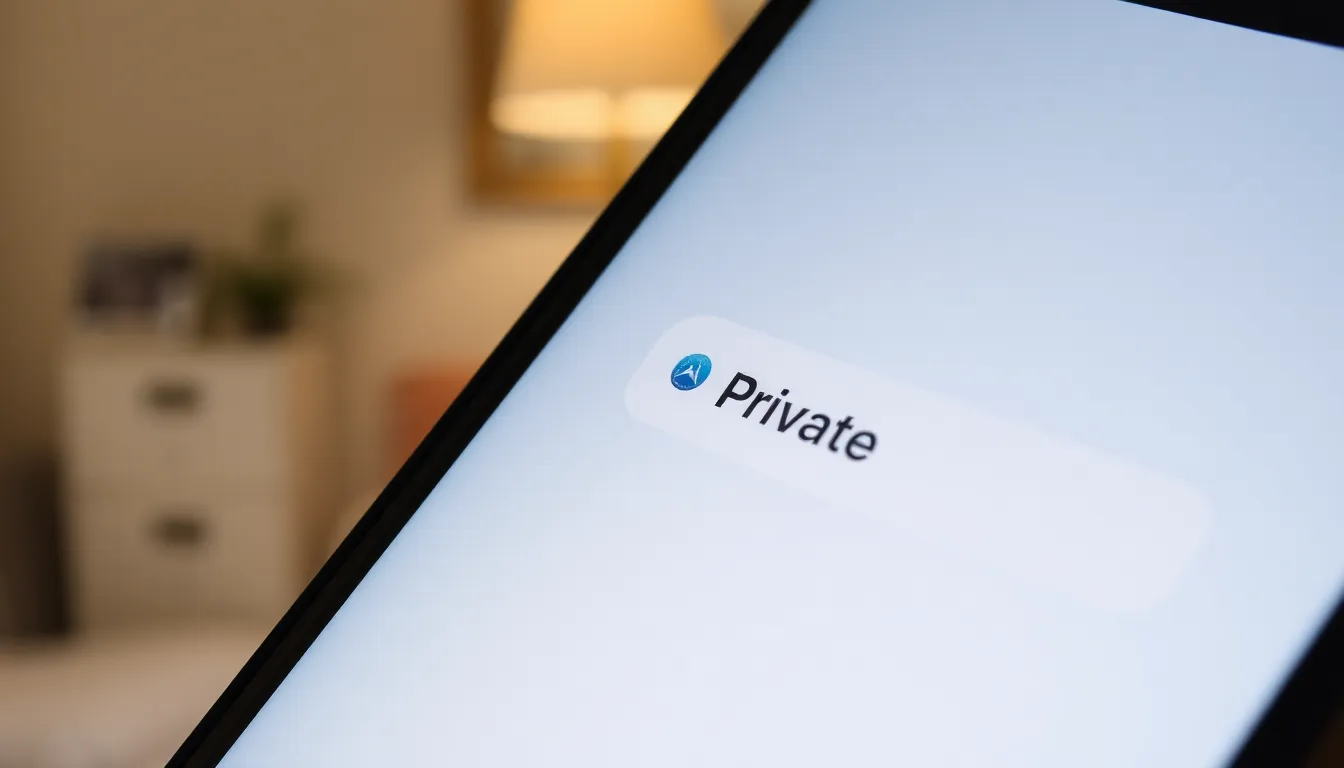
Disabling Private Browsing in Safari
To turn off private browsing in Safari, open the app. Tap the tabs icon, which looks like two overlapping squares. This reveals all open tabs. Next, locate the “Private” button, often highlighted in dark gray. Tapping this button switches back to regular browsing mode, allowing users to access stored history and saved login information. A quick overview of the browsing tabs appears, indicating the change in mode. Users can resume browsing without the restrictions of private mode.
Clearing Browsing History
Clearing browsing history enhances privacy and frees up storage space. To accomplish this, users should go to the Settings app. Scrolling down reveals Safari options; tapping it opens Safari settings. Under “Clear History and Website Data,” a simple tap clears accumulated history. Confirming the action removes all recent website visits from browsing history. This action does not affect private browsing data since it operates separately. Users enjoy a clean slate, helping enhance the browsing experience and ensuring greater privacy overall.
Troubleshooting Common Issues
Private browsing can sometimes present challenges. Users may encounter difficulties when trying to turn off this feature on their iPhones.
When Private Browsing Won’t Turn Off
Turning off private browsing may not always work as expected. Users should confirm they are in the right section of Safari. If the “Private” button remains highlighted, tapping it once should revert to normal settings. Restarting Safari or the entire iPhone often resolves lingering issues. It’s also important to ensure no restrictions are enabled in Screen Time settings that might prevent changes. Checking for software updates can address bugs that interfere with the private browsing feature.
Other Browsers and Private Mode
Different browsers offer their versions of private browsing. In Chrome, for instance, users can navigate to the menu and select “New Incognito Tab” for private mode. Firefox offers “Private Browsing” as well, which users can access through the main menu. Each browser has its unique methods for turning off private mode. Familiarizing oneself with settings can facilitate the switch back to standard browsing. If issues arise on other browsers, checking support documentation often provides assistance tailored to specific platforms.
Tips for Safe Browsing
Safe browsing practices contribute significantly to online security and privacy. Users often prioritize measures that enhance their protection while navigating the web.
Enhancing Your Online Privacy
Protecting personal information becomes essential during online activities. Using HTTPS websites provides a secure connection, safeguarding data from eavesdroppers. Regularly updating browsers and devices ensures users benefit from the latest security patches. Additionally, utilizing strong, unique passwords for accounts helps prevent unauthorized access. Enabling two-factor authentication on accounts adds an extra layer of security. Privacy-focused search engines can also enhance online anonymity, as they don’t track user data. Regularly reviewing and adjusting privacy settings across apps and browsers builds a comprehensive approach to maintaining privacy.
Alternatives to Private Browsing
Exploring various browsing options allows for more tailored online experiences. Regular browser modes provide access to saved settings, history, and bookmark management. Utilizing browser extensions can enhance privacy by blocking ads and trackers. Privacy browsers, such as Brave or DuckDuckGo, prioritize user confidentiality and offer alternatives to standard browsing. Consider temporary browsing solutions, like using guest profiles, to keep activities separate without fully engaging private modes. Incorporating a virtual private network adds another layer by encrypting internet traffic and masking IP addresses. Regularly clearing cookies can improve performance and limit tracking without relying solely on private browsing.
Disabling private browsing on an iPhone is a straightforward process that opens the door to a more connected online experience. By following the simple steps outlined, users can easily switch back to regular browsing and regain access to their history and saved logins.
While private browsing serves its purpose for those seeking anonymity, returning to standard mode can enhance convenience and accessibility. Embracing safe browsing practices and exploring privacy-focused tools can further improve online security. Users can confidently navigate their digital landscape while keeping their preferences and privacy in check.